|
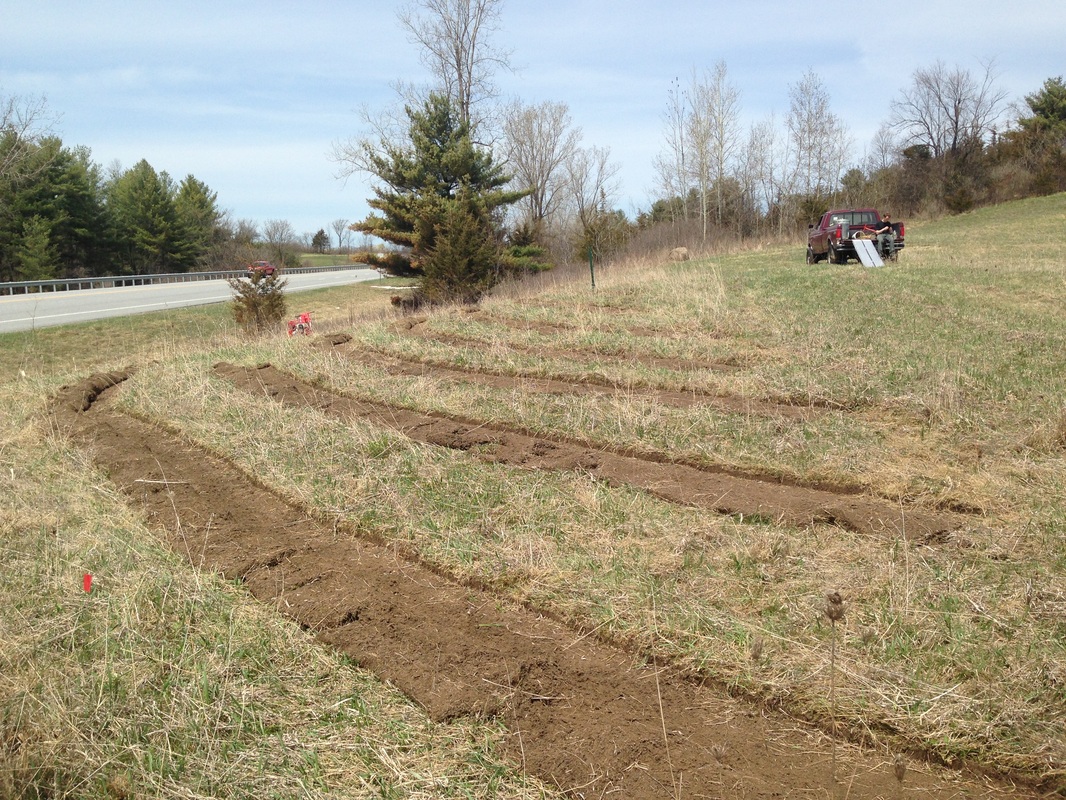
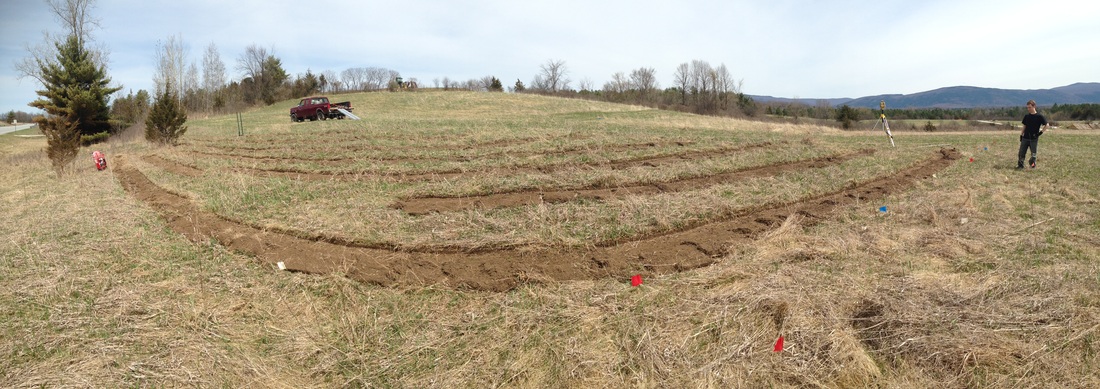
Pre-planting site prep is crucial to the long-term health and performance of any planting - and it's one of the easiest steps to neglect. Because of woody plants' lifespan, taking the time to do this work upfront can't be overstressed. It becomes increasingly difficult to remediate soil compaction, modify water flows, balance soil fertility, etc after trees are installed and have begun to mature. If you're feeling rushed to carry out a planting at just about any scale, it may prove better over the long run to take a step back and use the coming season as an opportunity to improve the site conditions first so that your trees find improved conditions when you do get around to installation. Of course, 'the ideal' and reality often do not easily intersect. For my hedgerow installation, I chose to focus my site prep on four primary site qualities - soil compaction, hydrology, weed suppression, and fertility. Here I'll explore my approach to these considerations in detail. The attached videos and photos hopefully help clarify my verbal description. Layout of the planting was of prime importance at the outset. With a slope that changes from moderately steep to much more gentle over the course of 500 or so feet, I wanted plantings to follow a contour pattern. But one challenge here was that this orientation meant that the contour lines along these 30' rows ran in the short direction (the landscape slopes downwards from north to south, so the planting rows were essentially oriented from west to east). I'd intended to address weed control and herbaceous competition at the same time as I developed my planting layout, and I chose to try using a 'sod cutter' machine to do just that. The silty-clay soil on my site made tillage a less-than-desirable option as I was concerned about compaction during the wet period in early spring. Given the density of the planting - roughly 5x5' spacing - it seemed far too cumbersome to use a mini-excavator to disturb the sod cover and expose bare soil while developing a swale on contour type layout. Unsure as to the best way to proceed, I remembered my days working with a friend at his landscaping business. I remembered that we'd once rented a sod cutter to simplify the tedious, heavy work required to skim existing sod from new planting beds. Developed for the commercial turf industry, this gas-powered tool features an 18" wide adjustable blade that you can set at anywhere from 1-2.5" depth which vibrates back and forth once engaged, severing the roots of herbaceous vegetation so that it's then possible to roll up the sod into neat little 'Swiss cake rolls' for transport to a landscape waiting for a new lawn. Although I'd never heard of anyone creating 'sod cut swales', I thought it might make for a quick and fairly easy way to create a 3' wide, 'weed-free' planting bed, without tilling, while developing a swale-like berm on the downhill side of each pass. For roughly $75 a day, I was able to rent this tool, that while heavy, I was able to load and unload from my truck by myself along with a set of aluminum ramps. It took me 2 working days to cut the sod swales with the sod cutter. Each day, for at least a portion of the day, I had a hard-working helper to assist with the sod turning (thanks Nick Hollis and Jesse LoVasco!). I started at the high point in the landscape, using my laser level to mark out contour lines at roughly 4-5' intervals. Because contour lines aren't symmetrical, there was some inconsistency in the row spacing, but for the most part, I was able to choose a starting point that resulted in largely uniform rows. I'd lay out as many rows as I had landscape flags for, marking points every 10 or so feet, and then fired up the sod cutter, cutting the sod's roots at 2" depth. I wanted to cut the roots as deep as practically possible. The sod cutter was not made to handle the dense growth and heavy root systems of the old hayfield in which I was working, so I found it was a bit much to cut the roots at the full 2.5" depth. Although it would have been more work, I think the tool would have worked even better if I'd taken the time to mow the planting area the previous season and raked up the long grass before using the sod cutter, setting it aside for mulch after planting. Sometimes the tool bound up with the dense vegetation, and I had to stop to clean it out. But all things told, it largely perfumed well, doing exactly what I had hoped. After cutting several lines with the machine, we proceeded to carefully flip the cut sod rows downhill, sculpting the sod lengths into an on-contour swale berm. It looked great, and as I later found, performed exceedingly well. Almost too well. Our spring is typically particularly wet, but 2012 proved to be unique. Starting a few days before receiving my plants (around April 26) and continuing on for another 3+ weeks, we received no rainfall. Like zero! But then during the 6 weeks thereafter, we received over 20"! More than 2/3 of our annual rainfall in just a month and a half. With the clay-rich soils so prevalent on the site, I found that on-contour swales probably weren't the best idea, as this extreme weather event left standing water in the swales for multiple days. One dilemma I encountered when developing this sod-cut swale idea was where to actually place the plants within the swale itself. Knowing full well that the trees would be best-off on the elevated berm, I was reluctant to plant bare root seedlings through 2 layers of sod, even if the top layer was upturned. So instead I centered the plants within the 'basin' portion of the swale - doing my best to keep them set back from the lowest part of the basin. From this experience, I've learned that a 1% grade is probably a much better layout for semi-on-contour plantings on these soils. This would still give the planting a contour-esque layout, but it would gently direct excess water away from the base of the plants. Because we receive such reliable rainfall here, this layout could allow me to send this excess water into small hand-dug pocket ponds that connect several planting rows. Then during extended dry periods, we could simply haul buckets from these basins and hand water the trees. I've been experimenting with this pattern on a small scale in our vegetable garden and plan to do it on a 1/2 acre berry planting we're doing this spring, so we'll see how it turns out. After one long workday, we'd created a sod-swale belt 30' wide by about 400' long - I still had another 400' or so to go. I ended up renting the tool once again about a week later to complete the job. Although I really liked the look and orientation of the contour swales, I could clearly tell that I was not going to finish the job if I continued to take the necessary time to use the laser level to lay out each row. At this point, I'd reached a much flatter stretch of the property, and so I chose a new approach. Given that I'd planned roughly 5 rows of plants from east to west, and that much of the time spent cutting the swales was spent when I had to tediously turn the machine around at the end of each row, I instead started to lay out just 1 contour swale every 50 or so feet. In between these stretches, I ran my rows cross-contour (north and south), creating 5 rows at roughly 5' spacing. This proved a much faster approach. Then as I removed the cut sod lengths, I used it to create a berm within each row, uphill from each plant. Although it didn't create a long line that followed contour, it allowed me to create micro-basins for each individual plant that also served to very effectively store water while creating a zone of bare soil around each tree where I broadcast a diverse cover crop seed mix after planting. One operation I definitely would have done beforehand was subsoil plow the planting zone to ameliorate the soil compaction that resulted from decades of hay harvest. While I have a Yeomans keyline plow, I'd already agreed to rent it to a farmer on the other side of the state during the early spring, assuming that the traditionally wet spring would make for poor conditions to subsoil plow my clay-rich soils. I of course kicked myself when we enjoyed a stretch of extended dry, which would've been a perfect window for subsoiling. So I instead took the manual route, using the heavy duty 'Meadow Creature' broadfork to hand prep the soil around each individual tree. It was a lot of work, but it did give me an opportunity to address soil compaction at each micro-site before planting. In the next installment, I'll describe the approach we took to installing the hedgerow plants, the plant layout, and the additional steps involved in giving the plants a head start.
14 Comments
|


 RSS Feed